By: Bryan Blazek – Date Posted: March 22, 2011
A bass jig is a fish catching tool that can be used in a variety of presentations. Some anglers will argue that the jig is perhaps the most versatile lure available to the modern angler. Advances in braided line have enabled the modern angler to fish structure and slop much more effectively than ever before.
Jigs are perfect tools in order to get into cover and mimic natural forage. A jig can be hopped back along the bottom, dragged at a snails pace, stroked, or swam at various depths imitating bait fish or frogs.
This highlights perhaps my favorite and most effective way of fishing a jig, with a bulky skirt and craw trailer, swam as a subsurface frog.
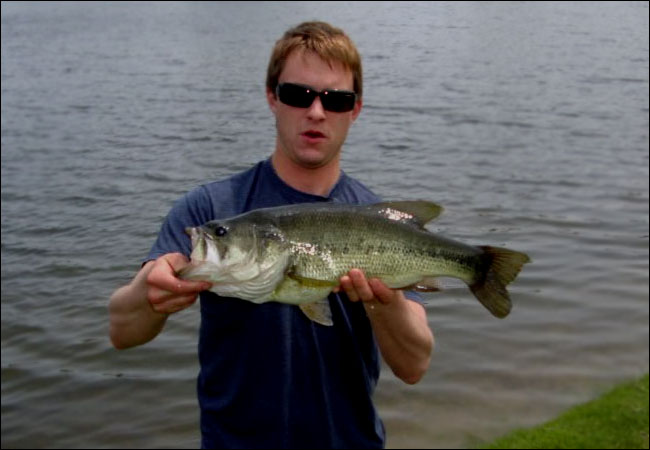
Bass love jigs, BIG bass love jigs. Many tours have been won with this lure, and the market is saturated with every color, size, and shape of bass jigs- some costing upwards of five dollars apiece.
Now I am not disputing that some of the premium jigs on the market are not excellent products, but it is hard to justify spending five dollars on a lure that you are intentionally going to throw into a tree.
Furthermore, the problem I have found is that halfway into the season, many tackle shops start to run out of all the colors I like. (I guess someone else is using my secret lure…)
From an appearance standpoint, most of all of the major tackle manufacturers still fall short in one specific area; they do not offer flash on their jigs. Flash is great for imitating bait fish, or giving a little something extra for stained water applications. This is the primary reason I started tying my own jigs, I wanted to add flash, and I had to take the skirts apart to do this.
Before I get too far into this, I’d like to add the disclaimer that I am not manufacturing jig heads myself. I have personally come across an eBay merchant who sells me all the jigs I need for about fifty cents apiece. It saves me the hassle of having to melt lead, buy molds, and so forth. Furthermore, I like to spoil myself with a package of premium jig heads from one of the big manufacturers every once in a while, as variations such as the Grass Bomb are not available in any of the commercially available molds.
This leads us into what we will need to source for our little project. First, you will need an assortment of jig heads, a common vise, a proper fly tying bobbin, a spool with some Power-Pro or similar braided line remnants, clear nail polish, jig rattles, a package of premium rainbow flashabou, and skirting material.
At this point, you can finally get creative.
Imagine all of the colors that have worked for you in past fishing experiences, and think of what you are trying to emulate with your bait. Is it a crayfish dancing in the rocks, or frightened bait fish scurrying just under the surface?
There are several options for skirt material such as living rubber, silicone, and round rubber, the last of which is often overlooked but very effective. It may cost a few bucks to get everything together, but when you have all of your supplies, you will be able to turn out custom bass jigs for a little over a dollar apiece, five minutes before you leave to go fishing. A hand tied jig will last longer, with fewer adjustments, giving you more time concentrate on fishing. When your friends and fellow anglers see these flashy new jigs, they will want to take you on trips on their boats, let you stay at their cabins, or even share their wives to get their hands on one of your custom lures.
First we are going to need to wind up an empty spool with some remnants of your favorite braid. I stumbled on this idea one day when I ran out of thread. I really like utilizing this braid alternative as opposed to rubber wrap or small thread because it allows me to make up to twenty-five wraps instead of many more with thread. It will also allow us to do something cool with the rattle later.
Next you are going to need some freshly painted powder-coated jig heads. I was going to thoroughly explain how to powder-coat the heads, but it is an extremely easy process. Color selections are endless, but I suggest purchasing black, brown, or green, and following the listed directions on the package.
Following the paint process, you will need to work with a vise. You will notice mine is of the “trusty-rusty” brand. First I tried this with a fly vise, only to find it doesn’t hold a hook over 4/0 well. Also, you can exert much more pressure on a standard vise as opposed to a fly vise. Take a look at how I positioned the jig and used an elastic band to secure the weed guard out of the way. The jig I am working with today is a half ounce Arkie style, with a 7/0 hook. The jig pattern being tied up is my Bama Bug.
Next, we will need to get our thread process started. Begin by wrapping the line over itself once, and continue down towards the hook shank with five or six neat wraps. It’s not a bad idea to throw down a dab of super glue on the jig before you wrap the thread in order to eliminate any possibility of your skirt from shifting.
Finally, we are ready to add our first skirt tab. A typical jig will consist of a 1/2 tab for finesse swim jigs, up to 3 or more for dark or stained water applications. You want to lay the middle of the skirt over the thread, and wrap it about three times.
Next the top color, and adding three more wraps.
If flashabou skirt material is added, I will clip a few strands out of the rainbow pack that I think will contrast with water clarity nicely. Strangely, most of the purple seems to be gone from this package because it is used most often. As far as other color options are concerned, black, or “baitfish emulator” works very well.
Here comes my signature feature.
Last summer, after losing rattles off of every style rattle band on the market right now, I knew there had to be a better solution. In order to correct this problem, grabbed my leftover Power-Pro, and began tying on my own rattles. I haven’t lost a rattle since then. To attach your rattles, use a knot that you prefer to attach with the Power-Pro. First tie it to the rattle, and then to the jig. When completed, use a tiny dab of super glue to make sure the knot doesn’t slip on the rattle.
Complete the jig by making a few more neat wraps, then use a few simple half hitches, or a whip knot to finish your jig. Seal up the thread with a dab of clear nail polish.
Lastly we need to trim away the solid ends of the tabs.
Take your jig out of the vise, and you will have something that closely resembles a jig from your favorite tackle shop, only WAY COOLER because you made it yourself!
I wouldn’t be doing you any justice if I stopped here, as this is often the most important and frequently neglected step of putting together a jig.
First the skirt needs to be trimmed back to just below the hook. Next, the weed guard needs to be trimmed and split. Consequently, splitting the weed guard will keep more weeds and debris off the hook, as well as protect you from snags should your jig roll onto its side.
Add your favorite trailer and enjoy!


